Sunday, October 2, 2011

Fall Pins & New Blog Look

I know I haven't posted in a while-- a really long time, actually, but I have been a busy little bee! I'm working 3rd shift now, and I don't know if I'll ever get adjusted to that kind of schedule-- I'm exhausted all the time! I changed up the look of my page, but I'm still playing around with the signature-- I get so frustrated sometimes with codes!

Since I've barely had time to craft (I usually forget to take pictures when I cook/bake) I don't really have any projects to post, so here's some things I've been pinning lately (SO obsessed with Pinterest!):

dryer vent pumpkin
Autumn decorated chandelier
Edgar Allan Poe raven Halloween plate
apple cider caramels
And, because Halloween is coming up, here's some super cute and creative costume ideas:

baby spaghetti

candy corn baby

family campfire s'mores costumes

Mr. T baby costume
  
I could go on forever! I'm a pinnin' fool! What fall inspiration have you found recently? Are you addicted to Pinterest (if you need an invite, let me know!), too? Feel free to follow me on Pinterest by clicking the button on the top right hand side of my site! I'll follow you back! Happy Fall! ;)

Friday, August 12, 2011

Guest Blogger on Fireflies and Jellybeans!

Hey everyone! I'm so excited to be guest posting at Fireflies and Jellybeans today for Christmas in July (now August)! I'm showing you all how to make Pumpkin Seed Poinsettia Ornaments! Check it out!

Monday, July 11, 2011

Buckeye Cookie Bars

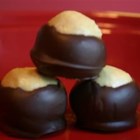
Have you ever had a Buckeye?


 {Buckeye recipe from All Recipes.com}
 
I'm pretty sure it started as an Ohio thing, but they should be known all over. They're delicious, and how can they not be? Little balls of peanut butter dipped in chocolate to look like a Buckeye nut. Mmm-- LOVE them, and they're a super easy holiday gift to give. Anyway, these yummy little cookie bars are inspired by the candy.

Looks good, no? Want to know how easy these lil' guys are to make? OK, here it goes.

What'cha need:
  • 1 Devil's food cake mix
  • ¼ c. vegetable oil
  • 1 egg
  • 1 can sweetened condensed milk
  • ½ c. creamy peanut butter
  • 1 c. peanuts (I left these out)
  • ⅓ c. canned chocolate fudge frosting
What'cha do:

Preheat oven to 350 degrees F. In a large bowl, combine cake mix, oil, and egg. Beat until crumbly (I just used a pastry cutter and combined them by hand). Reserve ½ c. of the mixture, and press the rest in a 9" x 13" pan that has been sprayed with nonstick cooking spray. For the filling, beat the peanut butter and sweetened condensed milk together. Stir in peanuts, if desired. Spread (heh-- wrong verb. Should say blob and attempt to evenly distribute the gluey mixture) over the crumbs. Sprinkle reserved crumbs over peanut butter layer and bake for 25-30 minutes, or until set. Cool completely. In a small resealable sandwich bag, add frosting and microwave on high for 5-10 seconds. Snip small corner off bag and drizzle in a criss-cross pattern over crumb topping. Chill until frosting sets. Cut into bars, and EAT 'EM UP!

* It's A LOT easier to cut (and chew!) if you let the bars come to room temperature before serving.


Linking up to the following parties:


Nothing But Country


Photobucket

Happy 1st Year Anniversary...


...to my super-cute, awesome, hilarious, husband! Yesterday was our first year wedding anniversary, and we had a great, low-key day together. We drove around for 4 hours exploring and looking for houses that were for sale. Afterward, we went to Olive Garden for dinner. Probably not the most exciting anniversary ever recorded, but I wouldn't have traded it for the world.
Seven years ago today, we began dating. John asked me to "go out with" him, and I said "sure, I guess." Haha! If that ain't happily ever after, I dunno what is! Love you, babe!
Photobucket

Wednesday, June 29, 2011

Goodwill Hunting!


No, not the movie, silly! The store. I LOVE thrift stores. Like big red puffy heart LOVE them. I just get so excited looking at the new (old) stuff that comes in daily, and I love looking for hidden treasures on the shelves. Luckily, Husband supports this, and also looks forward to thrifting. In fact, I'm pretty sure we've been 7 times to 4 different stores within 5 days. Anyhow, here are some of the goodies I've found:


Old Shabby Shutter. I've been looking for some old shutters ever since I saw someone display Christmas cards in the slats. Well, I finally found one! Two, actually, but the other was beat up pretty bad, and beyond repair. It was less than $2, and now I just need to figure out what color I want to paint it.


Antique Blue Ball Jar with Lid. I love all jars, but blue ones in particular. The rubber gasket fell off, but I think I can fit it back on. SIDE NOTE! Did you know you can take the annoying wax pencil price marks off of glass with mayonnaise? Before washing, just put a little blob on, let sit a minute, and wipe off. Ta da!


Mail sorter with 236 year old sticker I scraped off. Its ugly, but it was $1 so I don't mind. A little paint will spruce this baby up.

Have you found any good treasures at the thrift store lately?

Linking up here:
The DIY Show Off


Photobucket

Friday, June 24, 2011

I am... POOPED!

As in tired. Sleepy. Exhausted.
I started a new job this week (so thankful and glad of that), but I am not having an easy time adjusting to my schedule.
While training, I'll be on 1st shift (NOT a morning person--yet), and then eventually move to 3rd shift (those hours are more like my schedule!).
I was actually too exhausted every evening to even make anything, which is not like me.
I don't post everyday, but I can usually do something once a week.
Hopefully I'll be able to get some stuff done this weekend and this upcoming week.
I have a lot of ideas, so I'm hoping I'll get to all of them!
I have been working on cleaning my craft room (it should be quarantined), which is taking FOR. EV. ER. but I'm being thorough and actually throwing out and donating a lot, so I guess it will be worth it in the end. :o) And, I've taken both before and in-progress pictures (not sure if I'll show them yet or not.... trust me-- it's BAD!) and will also take after pictures.
I know it'll be a lot easier to work in once it's organized.
Besides, I'm itchin' to use my Silhouette, and I promised myself I couldn't even open it until I had a clean room-- and I've been good so far.
I'm hoping to relax and catch up on some sleep this weekend, and I'm excited because I get to visit with some good friends from college tomorrow for a game night!
It's been almost a year since I've been able to see them because they lived in Iowa. Now they're back in Ohio, so all is well! :)
Have a good weekend, and stay tuned for some projects next week!
Photobucket

Monday, June 13, 2011

My Favorite Fruit Dip!

I love summer time and cook-outs and get-togethers it brings! This was the 2nd weekend in a row that we've attended one, and this time I'm brought a fruit platter instead of a fattening dessert. To go along with the fruit, I whipped up this super easy fruit dip! I love this dip-- my mom used to make it since I can remember, and it tastes great with apples, grapes, and strawberries (and off the spoon...).
To make it, you'll need:
  • 1 {8 oz.} pkg. cream cheese, softened (I use Neufchâtel, or the less fat kind)
  • 1 {7 oz.} jar of marshmallow cream
  • 2 t. vanilla (or you can use other flavorings or extracts if you prefer)

     
That's it! Three easy ingredients! Beat the cream cheese and the marshmallow cream together until combined. Add vanilla and beat together. Refrigerate until ready to serve. Eat with apples, strawberries, grapes, graham crackers, or a spoon! Yum!!!

I'm linking up to the following linky parties:


Somewhat Simple

Wednesday, June 8, 2011

It's Here!!!

In April, I entered a giveaway to win a Silhouette SD machine from
A Bowl Full of Lemons.
I've never won anything in my life. And, I was merely 1 entry in a sea of 2600. She has an amazing blog, and many followers. Plus, I was brand spankin' new to the blogosphere, and it was my first giveaway.

BUT I WON! I won. Little ol' me! I could not believe it! I screamed when I read the email, and I think I scared the husband! :)

Well, it finally came today! I'm so excited to use it and make all the wonderful projects I've seen in blogland...
...but, I have to clean my craft room first. :(

Sunday, June 5, 2011

Lucky Duck!

Today I was making cookies for a cook-out we are attending with friends this evening. I asked husband to take out the trash for me, so he gathered it up and took it out. He came back a few minutes later and asked if we had any bread because there was a baby bird trapped behind the dumpster. We both go back outside and find a baby duck-- like seriously couldn't been more than a week old! I love ducks-- I feed them our stale bread every time they come by our apartment and John just rolls his eyes at me, but I can't help it. We put socks on our hands (we didn't have gloves!) and took our cat carrier out to put the baby in to carry him down to the pond. It took some persuading, but we finally coaxed him out onto the grass.
He wandered into the pond and was reunited with his mom and siblings! Ah-- the cuteness is killing me!
You can bet your sweet bippy that whenever we own a house we will be having a pond with ducks!


Friday, June 3, 2011

ABC Gum Magnets

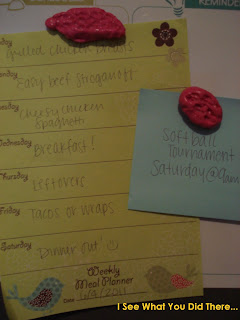
The other day I was shopping, and I saw a wad of chewing gum stuck to the side of the wall.
First of all, gross. Swallow it.
As I was staring at the chewed up germy gum with disgust, I had a eureka moment!
May I introduce................. chewing gum magnets!
They were super easy to make, too. And I had everything I needed already (love that!).
Here's what you'll need:

  • polymer clay (I used a mixture of dark pink and a cream color to get the color above)
  • strong magnet
  • clay glaze (I used gloss, so it looks all spit-filled and gross)
  • paint brush for glaze
  • card stock or index card to bake the clay on and a GLASS pan to bake it in (not pictured)
After working with the clay to soften it up, form it into a ball approximately ¾" in width. Now, for this part, you SHOULD probably make a mold from a real chewed piece of gum.

OR............... you could just do what I did (thankfully, Mom doesn't read my blog) and actually chew up the clay. I didn't put the whole thing in my mouth-- just pressed my teeth into it here and there.

Next, I added a strong magnet to the back. Since I wanted it to actually look like gum was holding up my pictures, I didn't want to just glue the magnet on.

I placed another piece of clay over the magnet and smooshed (it's a technical term) the seams together.
Placed the "gum" on card stock, and then onto a glass baking pan (DO NOT USE METAL--- the magnet will stick and pull out of the clay!).

Bake for 15 minutes at 265 degrees, and glaze when cooled. Put on fridge and gross husband out!


I'm linking up here:


The Shabby Nest

Fancy This


Thirty Hand Made Days

Wednesday, May 4, 2011

Barbeque Chicken Pizza

Look what I made for dinner tonight! Mmm!
I just made it up as I went along, and it was delicious!
It was my first time making pizza dough, so I was a little nervous.
I just searched the web for a recipe and used that. It was just ok I
(will definitely use my mama's recipe next time).
After I spread the dough onto the pan, I spread barbeque sauce down instead of pizza sauce.
Next, I sprinkled mozzarella cheese down, followed by shredded chicken (I just boiled a chicken breast, shredded it with 2 forks and stirred some barbeque sauce into it).
I then layered some fresh mushroom slices and topped it with more cheese.
Then, (you ready for this!?) I drizzled Ranch Dressing on the top! Mmm!
Baked at 500 degrees for 10 minutes, and IT. WAS. AWESOME!

Friday, April 22, 2011

Cute As A Cupcake {Stand} with Zero Calorie Cupcakes

So my mom's birthday was a couple weeks ago, and I wanted to make her a cake stand from thrift store china.
I found some pretty plates and an old candlestick (gave him some love with spray paint), and stuck them together with super glue.


I was going to make her some sort of dessert to put on it, but she's watching calories, so I didn't want to tempt her.
Even though everyone knows calories don't count on your birthday.
After trying to find a healthy alternative, I gave up completely and decided to just give her the stand.
One day when I was rummaging through the massive piles of junk and chaos looking in my craft room closet, I found some leftover Plaster of Paris as it fell on my head from my wedding.
So, I whipped up some NO CALORIE cupcakes, and my mama loved them!


This is how I did it--
You'll need:
  • Plaster of Paris
  • Water
  • An old spoon or plastic spoon
  • Old bowls to mix the plaster in
  • Acrylic paint (if you choose to make a certain "flavor"
  • Spackle or nail hole filler
  • Icing bags or Zip Loc baggies
  • Icing tips and coupler
  • Toppings-- glitter, "cherries", coffee beans, cinnamon, cocoa powder, plastic or clay candy and fruit, fabric paint
I mixed the plaster at a 2:1 ratio and stirred it up really well (I used 2/3 c. plaster and whatever half of 2/3c. is of water just eyeballed how much water). You have to work quickly, or it will harden and then you'll have lumpy blobs and not smooth cupcakes. The amount I used allowed me to make about 4 cupcakes at a time.
While I was mixing the plaster and the water, I added acrylic paint to change the color of the cupcake. In this case, I made yellow cake:


Next, I filled an old muffin tin from the $1 Tree with some paper cupcake liners I had. It should be the consistency of batter. If not, add a little more water. Then, blob it in the liners, leaving about a half inch of space. Remember to work quickly!


Let them harden for at least an hour (wash out your dishes ASAP so the plaster doesn't harden!).
They'll still look wet, and they will feel cold, but it'll be OK.
Now here's the fun part-- frosting and toppings!
Take some spackle and plop it in a bowl. These are the kinds I had at home:


The one in the tub is more 'whippy' than the other, and I think I like it better. It already looks like frosting, but I wanted to add some color. For butter cream, I added a little bit of beige paint to make it look more natural. I decided to go with pink frosting for my yellow cupcakes, so I added some red.


You have a little more time with the spackle to play with colors, since this doesn't dry as quick as the plaster does. Stir the paint in well, or you might have streaks on your finished cupcake (unless that's what you're going for!)
Next, I picked out an icing tip (I think it's #12... it's just a large circle) and prepped the bag.
Fold it down and fill it with the "frosting", just as you would for real cupcakes, and pipe it on!
I made swirls and just started on the outside edge and worked my way in. It also looks good with a star tip.
You can also frost them with a knife or spoon, if you're going for that look, too.


***Wash out your icing tips and bowls RIGHT AWAY!
I used super hot water and q-tips to make sure it was all out.
Now, add the toppings. If you want vanilla bean icing, adding black glitter to the icing works really well.
I've used glitter glass, little berries from an old Christmas wreath, coffee beans, cinnamon, cocoa powder, and plastic candy to decorate the cupcakes. 
Decorate while the spackle is still wet, so the toppings stay put. 


On the ones with blue icing, I used those little silver dragees that you use for cookies (but aren't supposed to eat--- what's up with that!?) and they discolored the spackle a little. Probably would be OK on vanilla icing though. You can also use that puffy fabric paint to make a glaze or swirls, like I did on the picture above (they have one called "Hot Chocolate" that looks like the real deal!).
And the best parts?! I didn't have to buy anything but the dishes, the cupcakes last forever, and they don't have any of that bad for you junk!!!

Oh, and I linked up to my first ever Frugal Friday linky party at:
Yaaaay!